Add a chair rail or wall board
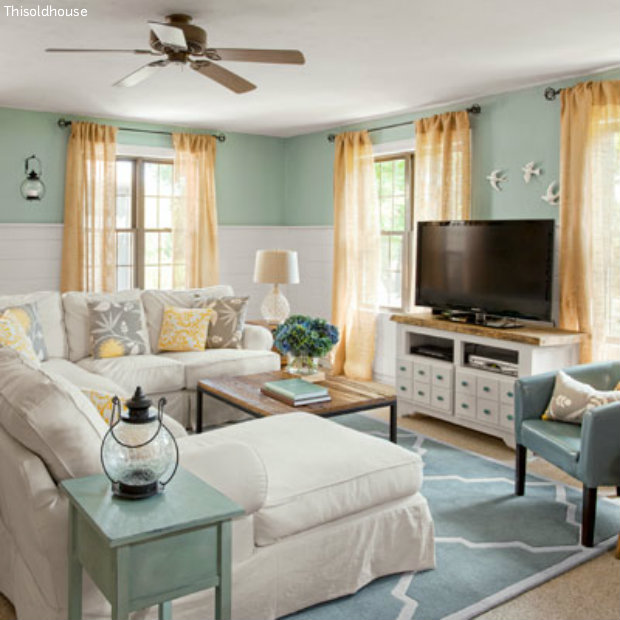
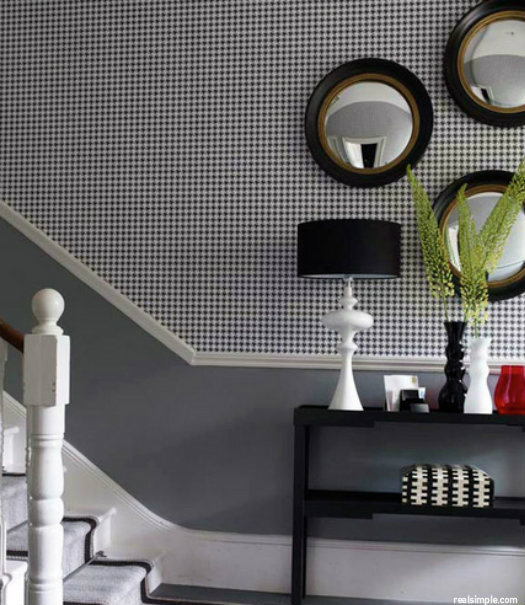
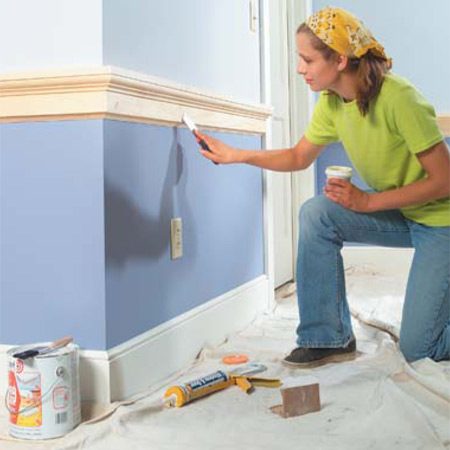
You don’t have to spend big bucks or hire a designer to redecorate a room. A simple, but elegant chair rail or boarding will do the trick. A well-designed chair rail is an attractive accent that also provides a clean dividing line so you can paint the upper part of a wall one color and the bottom another. Or wallpaper either one. It is simple and a great way to change the whole look of your room.Follow these easy to do steps from “the familyhandyman.com”
Tools you will need:
Have the necessary tools for this DIY project lined up before you start—you’ll save time and frustration.
- Hammer
- Miter saw
- Air compressor
- Air hose
- Brad nail gun
- Coping saw
- Tape measure
- Stud finder
- Caulk gun
- Belt sander
- Chalk line
- File
- Glue
- Hearing protection
Materials:
Avoid last-minute shopping trips by having all your materials ready ahead of time. Here’s a list.
- 8d finish nails
- Wood filler
- Primer
- Paint
- Caulk
- Sandpaper (100 grit)
- Chair rail / timber
- Let’s start:
- You can use pine moldings if you are going to paint or stain your rail, but they are available in other timbers too.You can hand nail all the boards and moldings, but we chose to hand nail only the 1×4 horizontal rails. We used a small air powered brad nailer to secure everything else. With brad nailing, there’s less chance of splitting wood or leaving ugly hammer marks. Decorative chair rails look best about one-third of the way up a wall. If in doubt, place a few strips at varying heights to get a feel for the right proportion.
-

Chair rail parts
1) Cut and nail the flat rail first

2) Mark where the chair rail goes
Make marks and snap chalk lines 32 to 36 in. off the floor. Locate studs with a stud finder or by probing with a finish nail, then mark other studs at 16- or 24-in. increments.
Make marks equal distances above the floor in all the corners of a room as well as next to all door and window casings. Connect these marks using white chalk in a chalk box, then locate and mark the studs. First install the horizontal 1x4s (the actual dimensions are 3/4 in. x 3-1/2 in.). Cut the rails to length, hold them in place, and then pre-drill small holes based on the stud marks on the wall. Align the top edge with the chalk line, then nail the rails using 8d finish nails. You can use simple square cuts where they meet at inside corners (Photo 4).Your outside corners will look neatest if you miter them. Align one board with the chalk line and trace along the wall to mark the back where it intersects the corner.
Use your miter saw to cut the angle, leaving the board about 1/8 in. too long, then temporarily tack it in place. Use a small test piece with a 45-degree angle to see if the other mitered 1×4 will meet it right. If it won’t, use your miter saw, sanding block or belt sander to adjust both miters until they fit.
3) Cut and add the top rail

4) Test fit the molded rails
Install the 3/4-in. x 2-in. top rails. Test-fit pieces and cut ends so they fit tightly against walls and one another. Scribe and sand edges so top rails fit snugly against walls.
Next, cut the 3/4-in. x 2-in. top rails and nail them to the 1×4 rails. Test-fit the ends of the boards on the inside corners (Photo 4), then cut to fit. If several layers of drywall compound hold the boards out from the wall, sand or plane the board edges until they fit tight. At the outside corners, again use miters and “test pieces” to get a tight fit.5) Now add the decorative moldings

6) Cut the molding upside down in a miter saw
Cut and install the bed molding. Place the molding upside down and hold it tightly against the fence of the miter box with clamps or cam pins. Secure the moldings in place with 3d finish nails.
Cutting and installing the bed molding is the most challenging part of the project, since it perches at an angle to the rails. As you work, keep picturing how it will sit against the rails after it’s installed. There are three details you need to contend with:
Outside corners. Outside corners meet with simple 45-degree miters. Position an overly long piece of bed molding in place, then make a little “tick” mark on the back lower edge where the 1x4s meet at the corner. This is the short side of your miter. Position the molding in your miter saw upside down (Photo 6) and use clamps or cam pins to hold the molding square to the fence. Set the saw at 45 degrees, line up the tick mark with the blade and carefully make the cut. It’s easy to screw up here—remember that your tick mark will be the shortest part of the miter. After one piece is cut and tacked in place, use a test piece to make certain the second piece will meet it at the correct angle.
Inside corners. Since inside corners are rarely square, mitered moldings usually leave a gap. It’s best to run one piece square into the corner (that’s the easy one!) and then “cope” a second piece to butt into it. The best way is to cut a 45-degree angle on a molding, then use that profile as a guide for cutting out the shape.
Returns. You need to “cap” the ends where the chair rail overlaps window and door casings. Cut the long piece of molding at a 45-degree angle so the long point is 1/8 in. shy of the outside corner (Photo 8) of the top rail. Then miter a small piece to turn the corner and “return” the molding to the horizontal rail. It’s like an outside corner, but the second piece is really small. Glue and tape the piece in place. You’ll bust it if you try to nail it. The smaller glass bead molding, which covers any gaps between the wall and bottom of the 1×4 rail, is a breeze compared with the bed molding. Cut and test-fit the outside corners the same as you’ve done with other outside corners. Since the molding is so small, you can miter (rather than cope) the inside corners.
7) Finish with a touch of filler and paint or wallpaper

Fill the nail holes and gaps with sandable wood putty, then smooth all surfaces with fine-grit sandpaper. Lightly run the sandpaper along the edges of the boards to ease them. If you have gaps larger than 1/8 in. where the 1×2 rail meets the wall, run a small bead of paintable caulk in the gap. Prime, then paint the wood. You’re done.
Tip: If you live in an old house with slanted floors, use a 4-ft. level to draw lines around the room, making sure that by the time you come full circle, the starting and ending heights are the same.
Tip: If your miters don’t meet perfectly, don’t panic. Moldings will cover gaps along the top and bottom edges and you can use putty (within reason!) to fill gaps before painting.
Tip: If you have moldings with a cope or angle on one end and a square cut on the other, always cut the cope or angle first. After you test-fit and fine-tune the piece, you can make the final (simpler) square cut to create the right length.
The choice of how fancy you want the look is yours. There are many cost effective timber profiles to suit.

pallet wall panelling 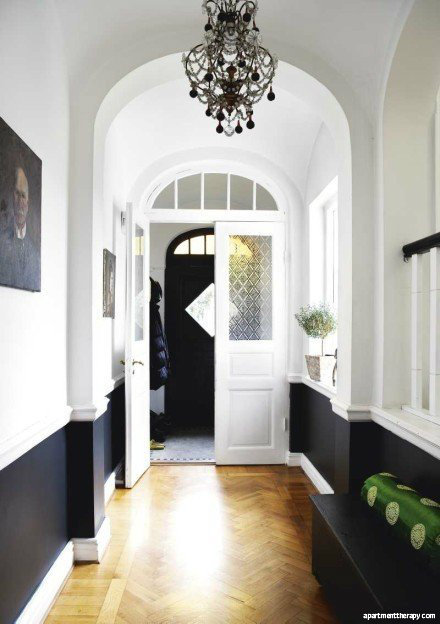
this chair rail adds drama So start creating a beautiful home on a budget today…